Enshrouded Melee Tank Build — Solo Every Boss
Stand your ground. Face-tank bosses, cleave through groups, and solo content that would one-shot other builds.
Updated | The safest way to solo every boss in Enshrouded
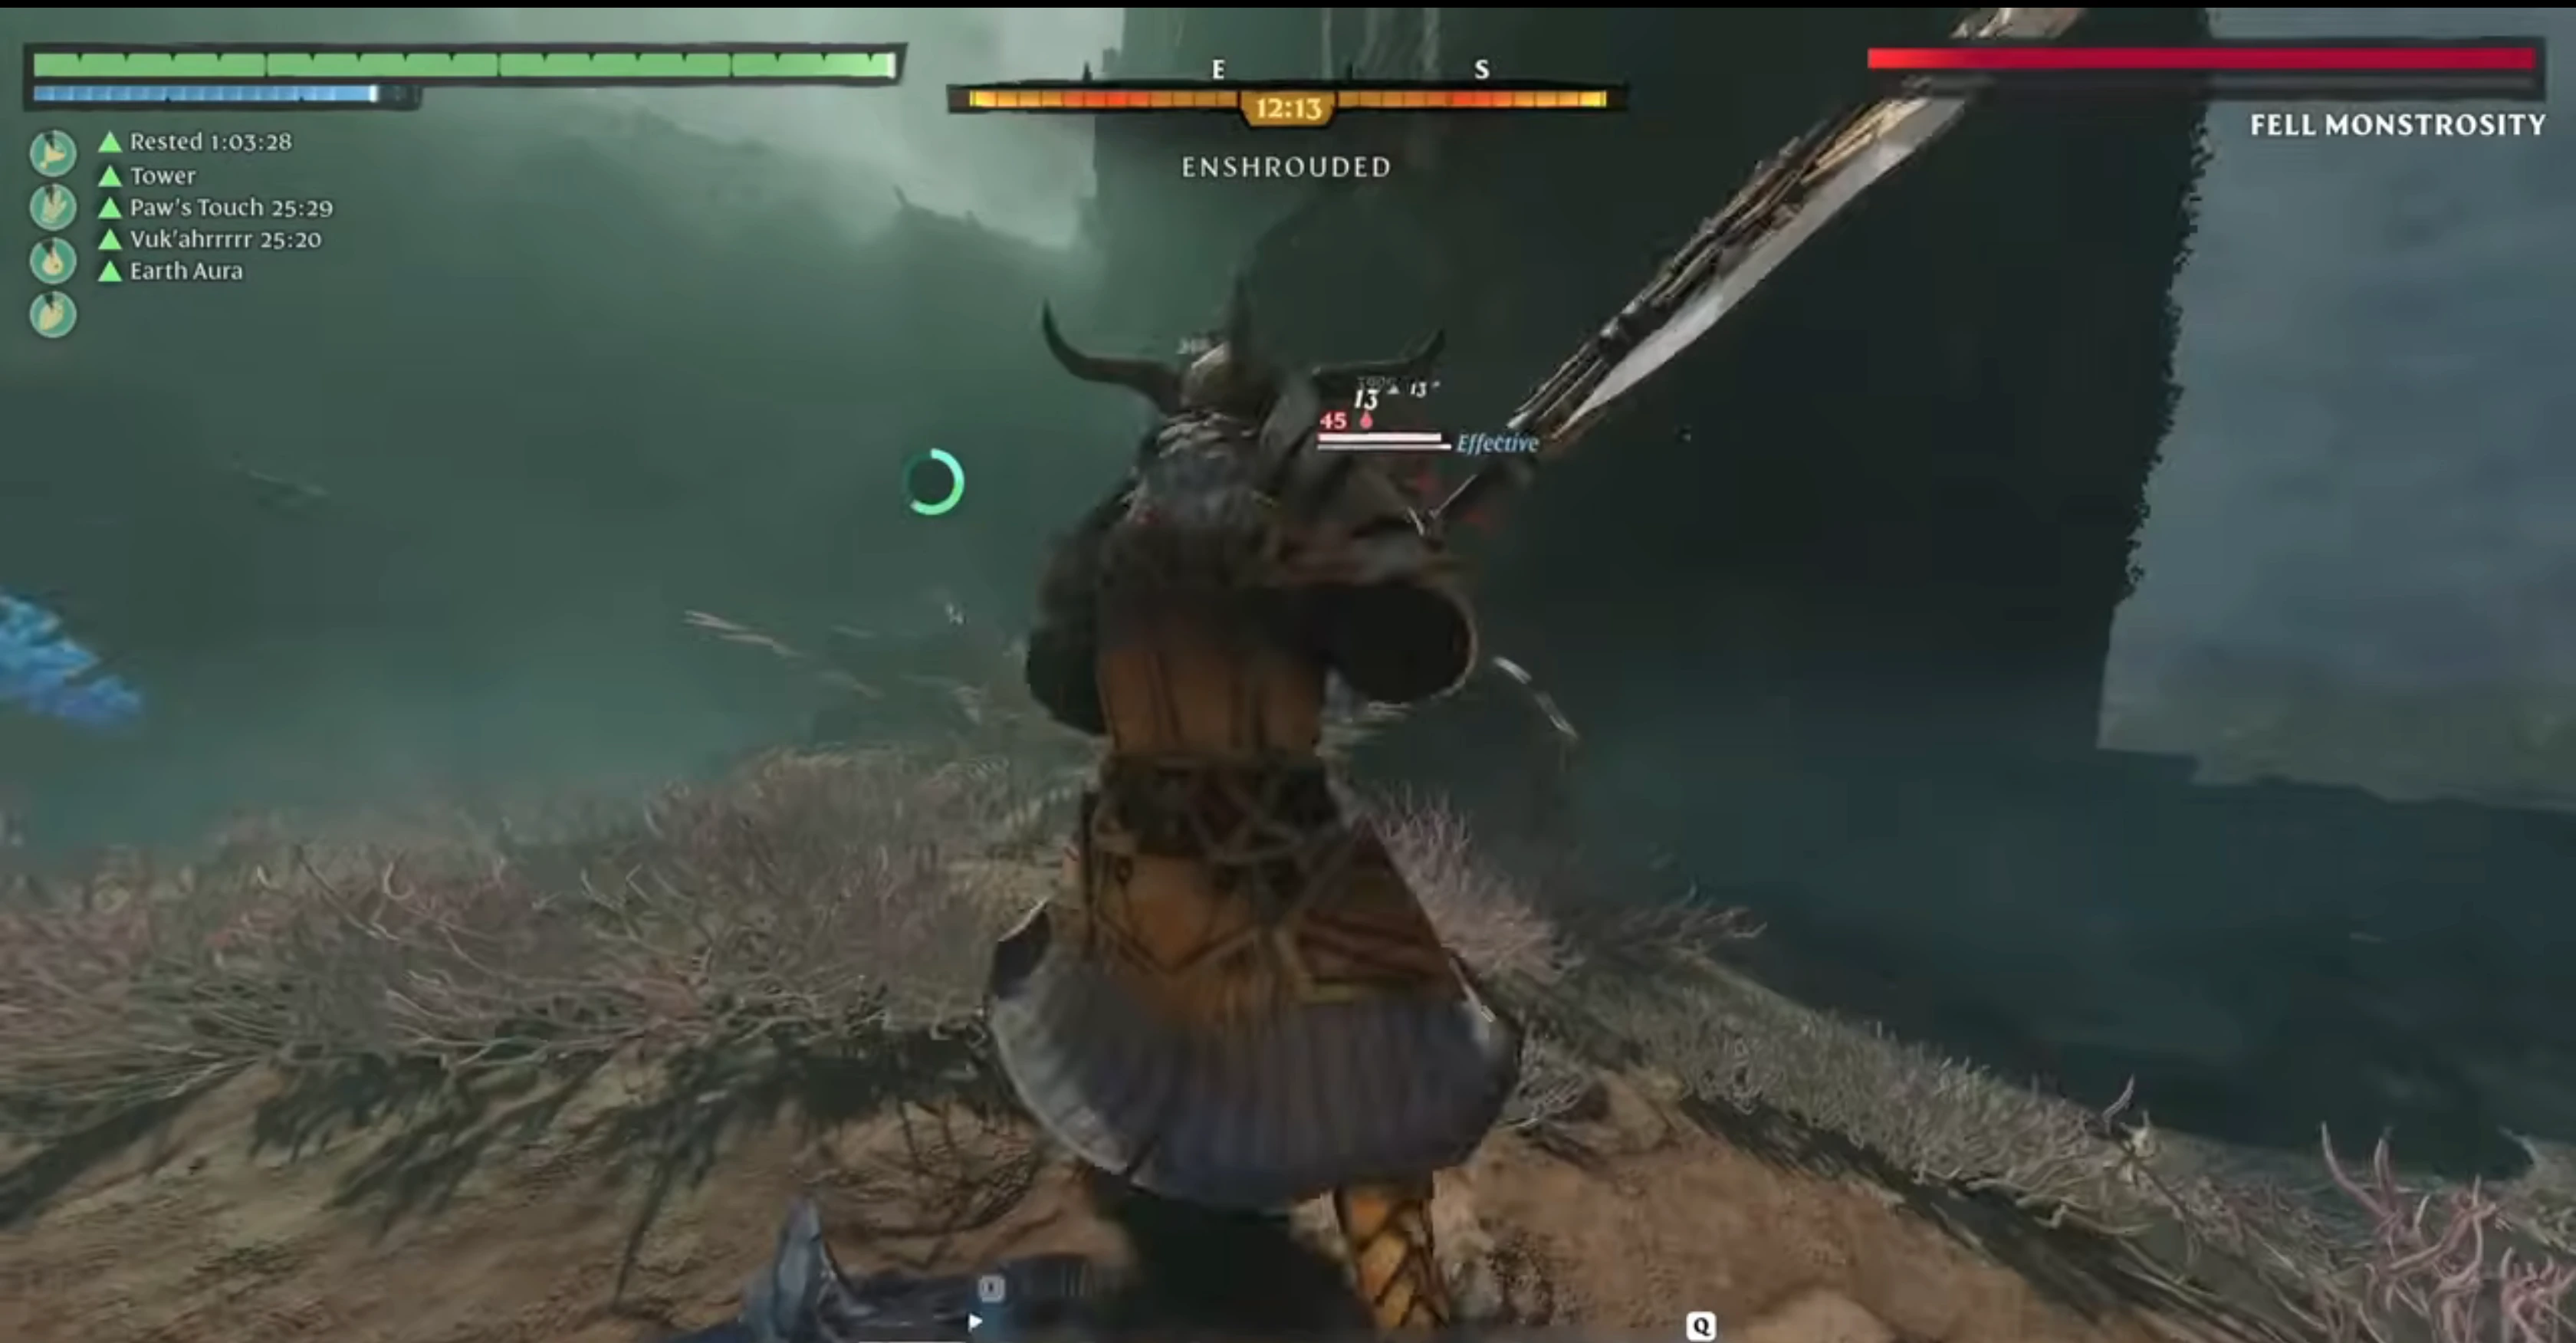
⚡ Quick Answer: The Barbarian (2H Greatsword) is the best melee DPS build in Enshrouded. Stack Strength + Constitution. Key skills: Blood Rage, Breach, Battle Heal. Key weapons: Guard of the North Sword or any legendary greatsword. This build face-tanks bosses with 80% armor mitigation and heals on crit.
🎯 Build Overview
✅ Strengths
- Near-unkillable in PvE with full Tank + Healer sustain
- Highest raw damage mitigation of any build
- Wailing Blade cleave destroys groups of enemies
- No complex rotations — just swing, block, repeat
❌ Weaknesses
- Low mobility — no Assassin tree investment
- Weak against flying enemies (Wyvern is harder than it should be)
- Slow clear speed for exploration and farming
- Limited ranged options
👤 Best For
- Players who want to solo every boss
- Those who prefer melee combat and hate dying
- Learning boss patterns (you live long enough to see them all)
- Not for: speed-runners or ranged-only players
The Melee Tank build turns Enshrouded's hardest bosses into endurance fights that you always win. By stacking damage reduction from the Tank tree with passive healing from Healer (Water Aura + Battle Heal) and the raw HP pool from Survivor, you become a walking fortress. The Wailing Blade's 3-target cleave means groups of enemies melt while you barely notice the damage.
This build starts to shine at level 8 when you have Double Jump + Water Aura + your first Tank passives. By level 15, you can face-tank the Fell Warden's charge and laugh. The trade-off is mobility — you won't be zipping around like an Archer — but you won't need to when nothing can kill you.
⭐ Skill Point Allocation
Turtle up. Every point makes you harder to kill while keeping your damage competitive.
| # | Skill | Tree | Why This Order |
|---|---|---|---|
| 1 | Double Jump | Survivor | Universal mobility. Mandatory first point for every build — exploration is impossible without it. |
| 2 | Dessert Stomach | Survivor | Fourth food buff slot. Stack HP food + stamina food + resistance food + flex. Free stats for 1 point. |
| 3 | Battle Heal | Healer | Passive combat healing. The first piece of your sustain engine. Already noticeable in early fights. |
| 4 | Endurance | Survivor | Stamina pool increase. More blocking, more swinging, more dodging. Tanking without stamina is death. |
| 5 | Iron Skin | Tank | Flat physical damage reduction. This is where the "tank" identity begins. Every hit you take now does less. |
| 6 | Vitality | Survivor | HP increase. Combined with Iron Skin, your effective HP against physical damage jumps ~25%. |
| 7 | Blink | Healer | Teleport dodge. Even tanks need to dodge sometimes — Blink is strictly better than rolling. |
| 8 | Water Aura | Healer | Passive AoE healing aura. This + Battle Heal = you regenerate HP faster than most normal enemies can damage you. |
| 9 | Bulwark | Tank | Increased block stability. You can now block boss heavy attacks without being guard-broken. Essential for the Fell Warden fight. |
| 10 | Merciless Strike | Center | Bonus damage to low-HP enemies. Tanks have lower DPS — this helps finish fights before they drag on. |
| 11 | Shell Shock | Center | Bonus damage vs armored enemies. Counters the tank's biggest weakness — slow kill speed on durable targets. |
| 12 | Juggernaut | Tank | Uninterruptible during heavy attacks. You can now swing the Wailing Blade through boss attacks without being staggered. |
| 13 | Steady Hands | Center | Reduced weapon stamina cost. More swings between stamina breaks. Synergizes with your large Survivor stamina pool. |
| 14 | Rebound | Center | Health regen after taking damage. Adds another layer to your sustain — you now heal from three sources simultaneously. |
| 15 | Survival Instinct | Survivor | Damage reduction below 30% HP. The ultimate safety net. If something somehow gets you low, you become even tankier. |
| 16 | Last Stand | Tank | Revive with 30% HP once per life. Your "never die" insurance policy. Turns guaranteed deaths into close calls. |
| 17 | Emergency Supplies | Center | Chance to not consume potions. Tanks use fewer potions overall, so this stretches them even further. |
| 18 | Updraft | Assassin | Glider boost. Delayed until late because this build prioritizes combat power, but still necessary for map traversal. |
| 19 | Scout | Survivor | Resource detection. Helps find ore for weapon upgrades. Quality of life for the farming sessions. |
| 20 | Retaliation | Tank | Reflect damage back to attackers. Rewards the "stand there and take hits" playstyle with free damage. |
🔒 Must-Have Skills
- Double Jump — first point always
- Iron Skin + Bulwark — tanking foundation
- Water Aura — sustain engine
- Juggernaut — uninterruptible attacks
- Last Stand — death prevention
- Retaliation — passive damage from being hit
🔓 Flex Slots
- Scout → skip for more Tank passives
- Updraft → take earlier if you explore more than you boss-fight
- Emergency Supplies → swap for more Center damage nodes
⚔ Weapons & Equipment
Big weapons for big damage. You can take hits — make sure enemies take harder ones.
| Priority | Weapon | Type | Why This Build | Crafting |
|---|---|---|---|---|
| Best | Wailing Blade | 2H Sword | Highest raw damage, cleaves 3 targets. With Juggernaut, you swing through boss attacks uninterrupted. | Iron Bars, Shroud Core |
| Best | Noble Sword | 1H Sword | Fast swing speed. Pair with Guardian Shield for the safest possible setup — block everything, punish safely. | Copper Bars, Wood Planks |
| Good | Fell Axe | 2H Axe | Armor break on charged attack. Excellent against Scavenger Warlord and armored Shroud enemies. | Iron Bars, Bone |
| Good | Guardian Shield | Shield | Parry window + block stamina reduction. Mandatory if using 1H weapons. Synergizes with Bulwark. | Iron Bars, Leather |
| Good | Reinforced Mace | 1H Mace | Blunt damage ignores armor. Situational swap for heavily armored bosses. Slow swings, so time carefully. | Iron Bars, Stone |
| Skip | Scorching Wand | Magic | Zero INT scaling. Wand damage will be single digits. Don't bother. | — |
🛡️ Armor Preference
Stack physical defense and HP. Blacksmith armor is your early-game goal — it provides the best physical mitigation until you can craft Tank-specific sets. Avoid light armor with evasion bonuses — you want to get hit so Retaliation procs.
💀 Combat & Boss Strategy
This build was designed to solo bosses. Here's how each matchup plays out.
| Boss | Difficulty | Strategy With This Build |
|---|---|---|
| Fell Warden First Boss | 🟢 | Trivial. Block his charge (Bulwark prevents guard break), swing twice with Wailing Blade, repeat. His ground slam does negligible damage through Iron Skin. This fight is over in under 2 minutes. |
| Wyvern Flying | 🟠 | The tank's hardest fight. Wyvern stays airborne and your melee can't reach. Bring a bow (even without Archer investment, the base damage helps). Wait for it to land, then punish with charged heavy attacks. Water Aura keeps you alive during the aerial phases. |
| Matron Poison/Shroud | 🟢 | Poison damage is tick-based, which your sustain engine (Water Aura + Battle Heal + Rebound) out-heals. Stay in melee range, watch your Shroud timer, and this boss melts. |
| Scavenger Warlord Humanoid | 🟡 | His fast combos can overwhelm if you're not blocking. Use 1H Sword + Shield over 2H for this fight — the parry window matters more than raw damage. Shell Shock helps punch through his armor. |
| Fell Dragon Endgame | 🟡 | Multi-phase fight tests your endurance — which is exactly what this build excels at. Juggernaut lets you swing through his wing swipes. Last Stand is your backup if the fire breath catches you. Bring fire resistance food in your fourth buff slot. |
| Hollow King Secret | 🟠 | The King's damage output is high enough to threaten even a tank. Retaliation does work here — his multi-hit combos bounce damage back. Keep Water Aura up, don't get greedy with your swing count, and chip him down. |
🗺️ Leveling Roadmap
🟢 Early Game
~0-10 skill points
Foundation: mobility + early tanking
- #1-2 Double Jump + Dessert Stomach
- #3-4 Battle Heal + Endurance
- #5-6 Iron Skin + Vitality (tank identity)
- #7-8 Blink + Water Aura
- #9-10 Bulwark + Merciless Strike
🟡 Mid Game
~10-18 skill points
Combat power spike
- #11-12 Shell Shock + Juggernaut
- #13-14 Steady Hands + Rebound
- #15-16 Survival Instinct + Last Stand
- #17-18 Emergency Supplies + Updraft
🔴 Late Game
18+ skill points
Finishing touches
- #19-20 Scout + Retaliation
- Beyond: Fill remaining Tank passives
- Optional: Dip into Assassin for mobility
⚠️ Common Mistakes
Mistake #1: Going full Tank before getting sustain
Iron Skin and Bulwark reduce damage, but without Water Aura + Battle Heal, you're just dying slower instead of not dying at all. Damage reduction without recovery is a losing strategy.
Fix: Get Battle Heal (point #3) and Water Aura (point #8) before investing heavily in Tank passives. Sustain first, mitigation second.
Mistake #2: Ignoring stamina management
Blocking boss combos drains stamina fast. If you run out of stamina while blocking, you get guard-broken and eat a full combo. Endurance + Steady Hands are not optional — they're what let you keep your shield up.
Fix: Points #4 (Endurance) and #13 (Steady Hands) are must-haves. Don't delay them.
Mistake #3: Using 2H weapons against fast bosses without Juggernaut
The Wailing Blade is amazing, but without Juggernaut (point #12), fast boss combos will interrupt your slow 2H swings. You'll spend more time staggered than swinging.
Fix: Use 1H Sword + Shield until you unlock Juggernaut at point #12. Then switch to 2H.
Mistake #4: Skipping Updraft entirely
Yes, this is a combat build. But Enshrouded is still 70% exploration. Without Updraft, you'll waste enormous amounts of time walking around cliffs and ravines. One point is worth it.
Fix: Point #18 is Updraft. Take it earlier (swap with #14 Rebound) if exploration is frustrating you.
🔄 Advanced Variants
🧪 Immortal Variant
Swap: Shell Shock + Merciless Strike → 2 more Healer passives
Why: Sacrifices damage for even more sustain. Water Aura + Battle Heal + additional Healer nodes = you literally cannot die to chip damage.
Best for: Learning new bosses, group play where someone else does the damage.
🧪 Bruiser Variant
Swap: Last Stand → 2 more Center damage nodes
Why: Trades the death-prevention safety net for higher sustained DPS. Faster clear times, but you can actually die if you mess up.
Best for: Farming content you're already comfortable with.
Related Builds
Starter Build
Start here, then transition into Melee Tank at level 15.
Archer Assassin Build
The opposite playstyle — kite and burst instead of face-tank.
Full Skill Tier List
Compare every skill before you commit your next respec.
Best Melee DPS
2H Greatsword Barbarian out-damages every other melee setup. Stack Strength + Constitution for maximum survivability and damage output.
Self-Healing Via Crits
Battle Heal + Water Aura + crit-based healing keeps you alive through every boss encounter without relying on potions.
80% Armor Cap (Update 8)
Update 8 raised the armor mitigation cap to 80%. With Iron Skin + Bulwark, you can reach the cap against physical damage, making you nearly unkillable.
📖 Related Guides
⚔️ Best Weapons Tier List 🛡️ Armor Sets & Stats 💀 Boss Solo Strategies 💎 Legendary Weapon Farm
⚙️ Build Loadout Details
Gear, gems, food, and combat rotation — everything you need to run this build at full power.
🛡️ Equipment Slots
| Slot | Best Item | Notes |
|---|---|---|
| Head | Guard of the North Helm | Phys +26, mid-game farmable |
| Chest | Radiant Paladin Chest (Lv 25) | Phys +70+, best scaling heavy chest |
| Gloves | Wolf's Fang Gloves | +15% one-handed damage if using 1H+Shield variant |
| Pants | Sunpiercer Pants | Phys +50+, endgame heavy plate |
| Boots | Sunpiercer Boots | Phys +30+, endgame |
| Weapon | Guard of the North Sword | 101 damage, Shock enhancement — best Greatsword |
| Shield | Tower Shield (any high-stability) | Max block stability for boss heavy attacks |
💎 Gem Recommendations
💎 Gem of Cutting
Slot: Greatsword
Why: Physical bleed DoT. Procs on every swing. Adds ~15% total DPS.
💎 Gem of Burning
Slot: Greatsword (alternative)
Why: Fire DoT. Use if you haven't found Cutting. Slightly less DPS but more consistent.
💎 Gem of Currents
Slot: Shield (if slotted)
Why: Shock chain on block. Stuns nearby enemies when you block — great for group fights.
🍖 Food Buff Combination
| Category | Recommended | Effect |
|---|---|---|
| Meat | Beef Stew | +Max HP — stack as high as possible |
| Grain | Cooked Rice | +Melee damage % — Update 7 changed food to %-based |
| Liquid | Water / Stamina Drink | +Stamina regen — block and swing sustain |
| Sweet | Honey (4th slot) | Extra stamina regen — Dessert Stomach unlocks this |
⚔️ Combat Rotation
Blood Rage (pre-fight buff) → Breach (gap close) → heavy attack → heavy attack → Block (boss counter window) → Merciless Attack on stun → repeat. Save Shockwave for add waves.
- 2026-07-18 — Updated for Update 8: 80% armor cap, Greatsword buffs. Image added.
- 2026-07-10 — Initial melee tank build. Barbarian 2H Greatsword.
Was this build guide helpful?